
n8n Tutorial | The Ultimate Guide: Build Your First Automated Workflow From Scratch (With Practical Examples) | low cost of self hosting wiht n8n
You might have heard about some automation tools, but you got discouraged by the bewildering array of options and complex settings. It's like a new gamer who gets a piece of equipment but has no idea if it's valuable. How do I use it?
If the above troubles sound familiar, then today's n8n tutorial is for you!
The tool I'm introducing today is your "digital life superpower generator": n8n. It's like a powerful universal translator that allows the hundreds of applications you use every day (like Google Sheets, Slack, Notion, Gmail) to communicate and work together.
This ultimate guide will take you by the hand and lead you from scratch to an in-depth understanding of the n8n world.
After reading, you'll be able to master this powerful tool, hand over those annoying trivial tasks to the computer, and truly save your time and energy for things worthy of your talent.
What is n8n? What is the features of n8n?
n8n Tutorial | low cost of self hosting wiht n8n
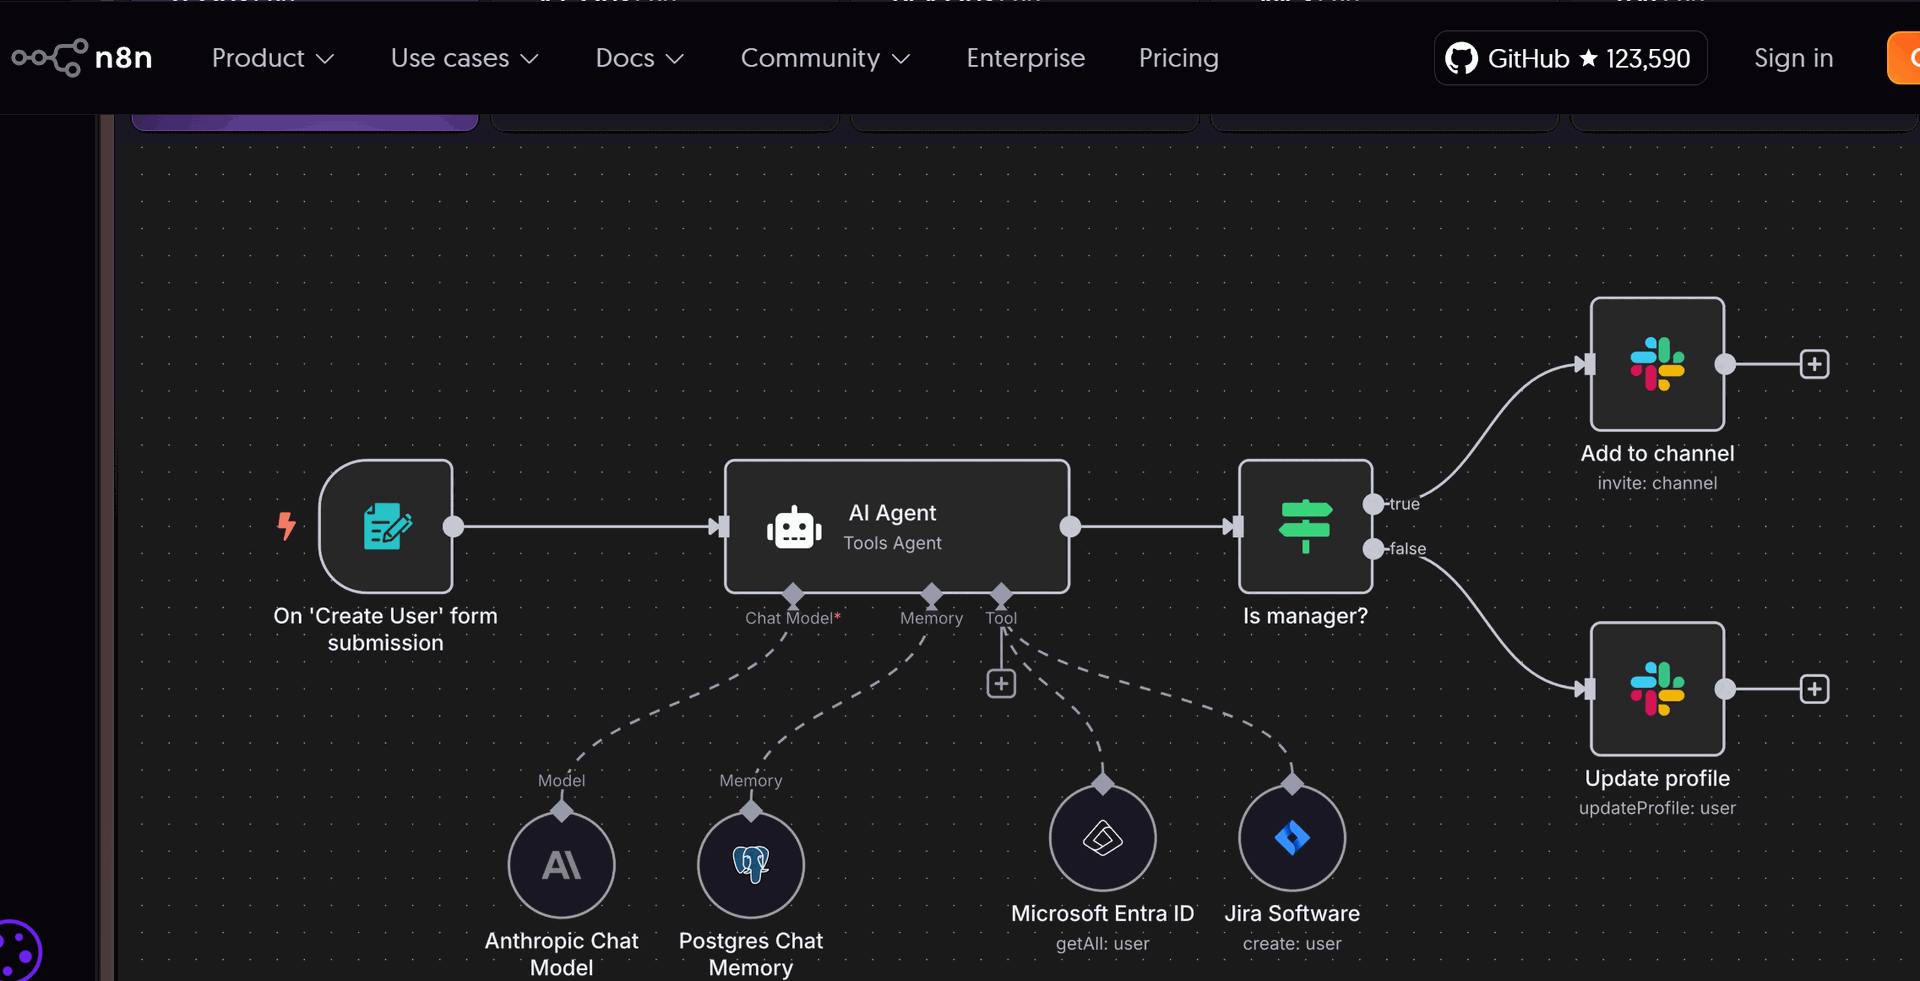
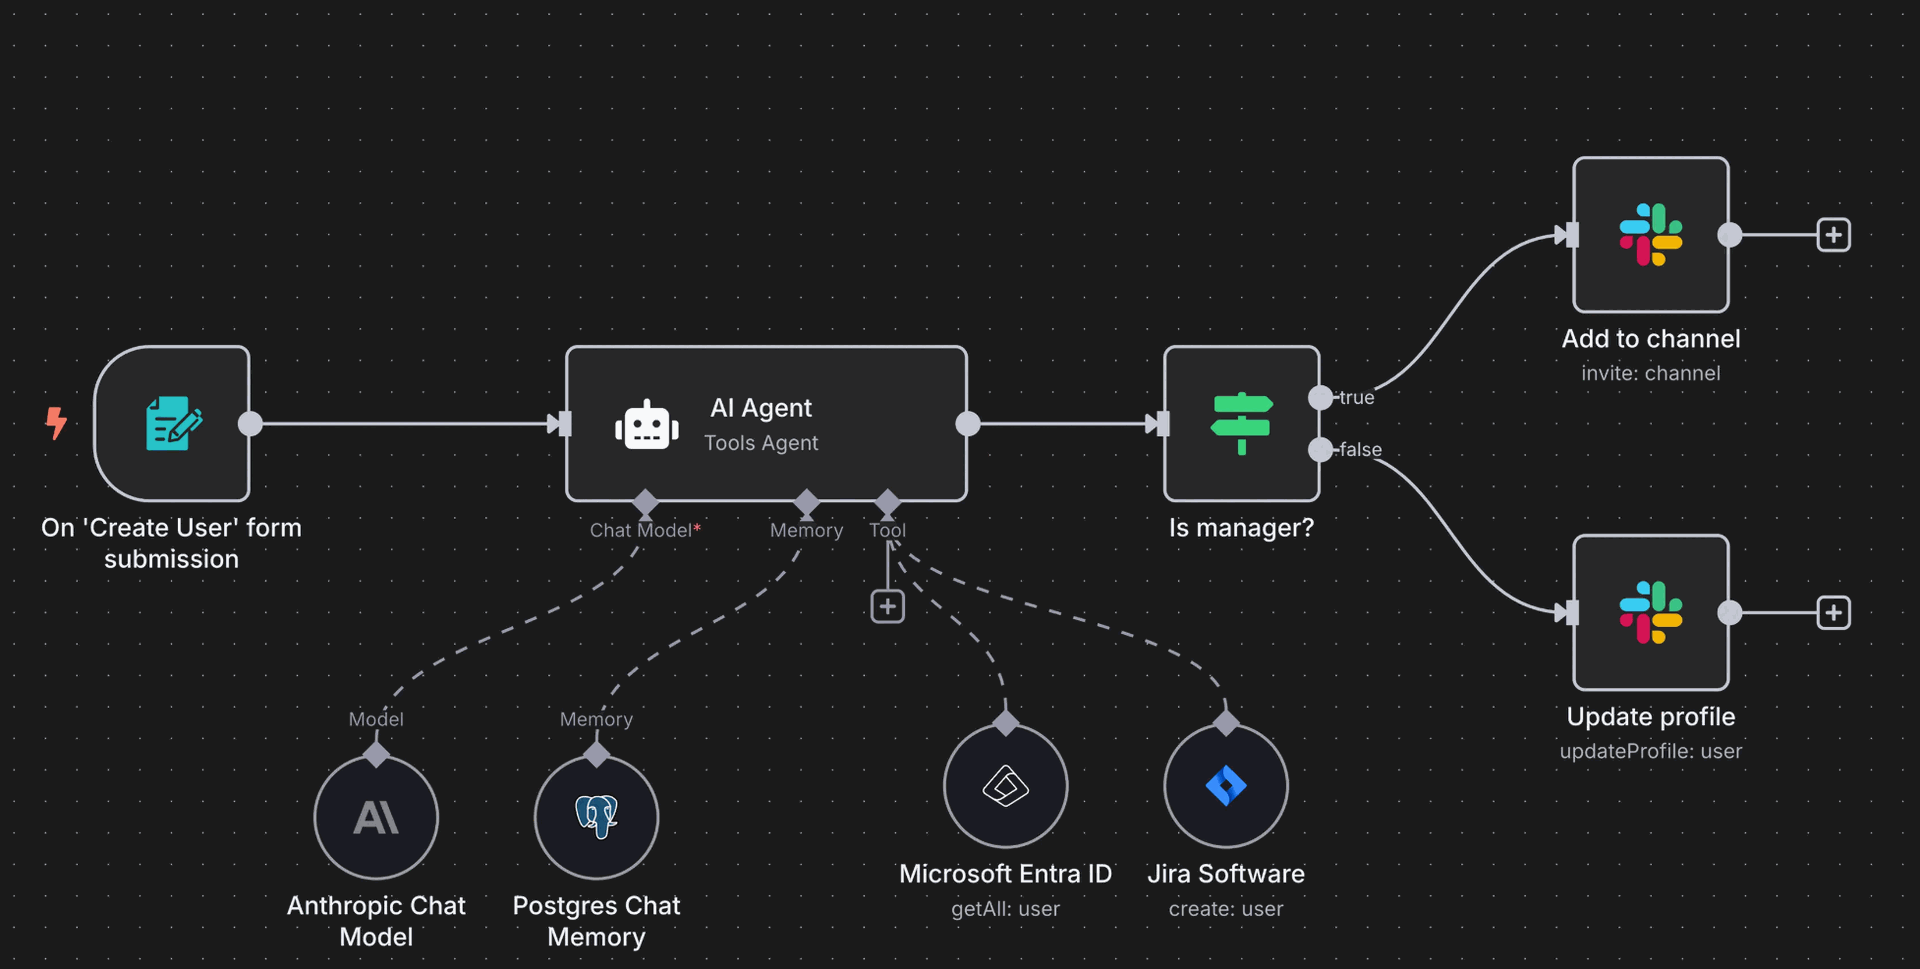
n8n Case:Automating from Form to Spreadsheet
What is n8n? What is the features of n8n?
Before we get our hands dirty, let's take a moment to get to know our new friend. Simply put, n8n is a workflow automation tool. You can think of it as a box of digital Lego blocks. Each "Node" is a Lego block that represents an application or an action. And you are the architect who can build an automatically operating "Workflow" by dragging and connecting these blocks.
For example, you can build a flow like this: "When my Google Form has a new response (Trigger) → Automatically add the response content to a Notion database (Action 1) → And simultaneously send a notification to my Slack channel (Action 2)."
The entire process can be automatically completed for you by n8n, 24/7.
AI Automation Hong Kong | Cases in Hong Kong and Asia | n8n vs Make vs Zaiper


n8n Tutorials | n8n Environment Setup
Enough theory, it's time to get practical! To start using n8n, you have two main paths to choose from:
1. n8n Cloud - The Easiest Starting Point
If you want to skip all the technical setup and start playing with automation immediately, n8n Cloud is your best choice.
- Pros: No server management, automatic updates, official technical support.
- Cons: Has execution limits, and costs increase with usage.
- Setup Steps: Go to the official n8n website. Click "Get Started for Free" and register for an account. After registration, you'll have your own dedicated n8n interface and can jump straight to the next chapter to start building workflows! It's that simple!
2. Self-Hosted - The Money-Saving Method for Full Control
If you're a tech enthusiast or have strict requirements for data privacy and cost-effectiveness, then self-hosting will be your playground. There are two popular methods here:
Method A: Using Docker (For users with a technical background)
- Install Docker: Ensure Docker is installed on your computer or server.
Run the n8n Container: Open your terminal, paste the following command, and execute it:
Bash
docker run -it --rm --name n8n -p 5678:5678 -v n8n_data:/home/node/.n8n n8nio/n8n
- The -v n8n_data... parameter is crucial. It saves your workflows and credentials locally, ensuring no data is lost.
- Access n8n: Open your browser and go to http://localhost:5678.
官方設定: https://docs.n8n.io/hosting/installation/server-setups/docker-compose/
Method B: Using a One-Click Template from a VPS Provider (Recommended for everyone, including beginners)
This is our most recommended method. It combines the low cost of self-hosting with the near-simplicity of the cloud version.
- Get a VPS: Choose a VPS provider like Hostinger. For most people, the KVM 1 or KVM 2 plan is more than enough. Choosing a 12 or 24-month plan usually locks in the best price.
- Select the n8n Template: During the VPS setup process, in the Operating System section, simply search for and select "n8n". This will save you all the trouble of manual installation.
- Manage and Configure: After the setup is complete, you'll see the n8n management interface in your VPS dashboard. Click to enter, and you'll get a URL and a default username/password to access n8n.
- Activate the Free Community Edition License: After logging into your n8n, the system might prompt you to activate a license. You can click "Send me a free license key," enter your email, and n8n will send you a free community edition key. Paste the key in to unlock all premium features!
See the n8n welcome screen? Congratulations! You have successfully built your very own automation command center on your own turf, at the lowest possible cost!


n8n Tutorial | Deconstructing the Fundamentals
When you enter the n8n interface, you might see a blank canvas. Don't panic! This is your creative space. Let's get to know the core elements that make up an n8n workflow—the "digital Legos" we mentioned earlier.
- Workflow: The entire canvas, along with all the nodes and connections you place on it, is a "Workflow."
- Node: The smallest functional unit in a workflow. By clicking the + button on the canvas, you can see the hundreds of nodes n8n supports, including application nodes (Google Sheets), logic helpers (IF), and data processing nodes (Code).
- Trigger Node: The starting point of every workflow. It's the "switch" that initiates the entire process and is usually green. Triggers can be scheduled, activated by a Webhook (for real-time triggers), or run manually.
- Connections: The arrows between nodes that define the flow of data.

- Credentials: Securely stores the authorization information (API keys, usernames/passwords) for connecting to various services (like Google, OpenAI). Set it up once, and you can reuse it in all your workflows.
- Data Flow & Expressions: The essence of n8n. Data flows between nodes in the form of "Items." You can use {{ ... }} expression syntax to extract the data you need from the output of a previous node. For example, {{ $json.name }} can grab the data labeled "name."
n8n Case:Automating from Form to Spreadsheet
現在,讓我們結合剛學到的知識,打造一個非常實用的初學者工作流程!
🎯 Our Goal: Create a web form. When a user submits data, it's automatically added to Google Sheets, filtered by the user's occupation, and then a customized email is sent.
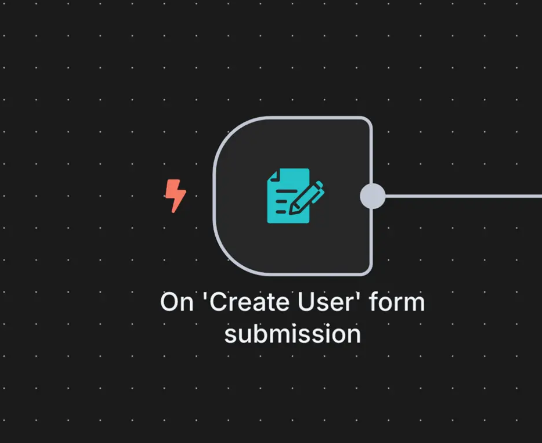
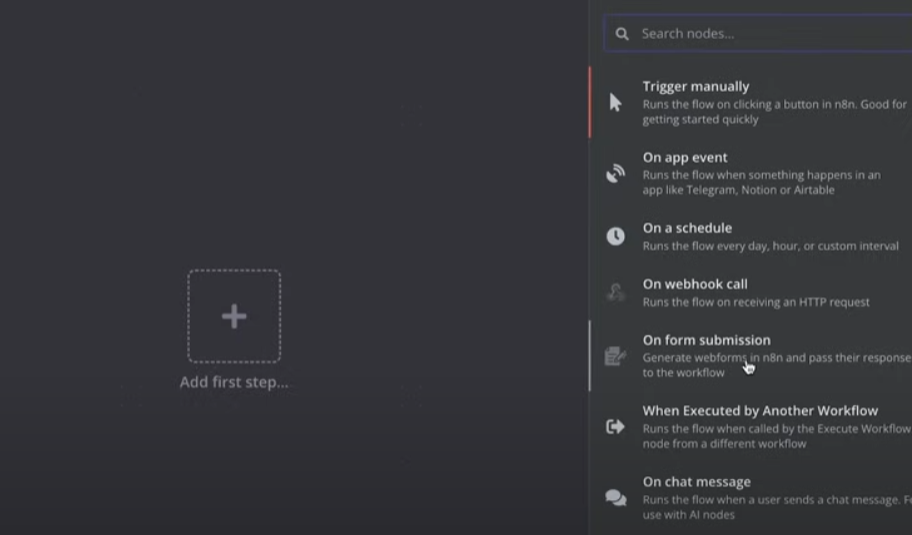
Step 1: Set Up the Trigger (On Form Submission)
- On the blank canvas, click + and select the On Form Submission trigger.
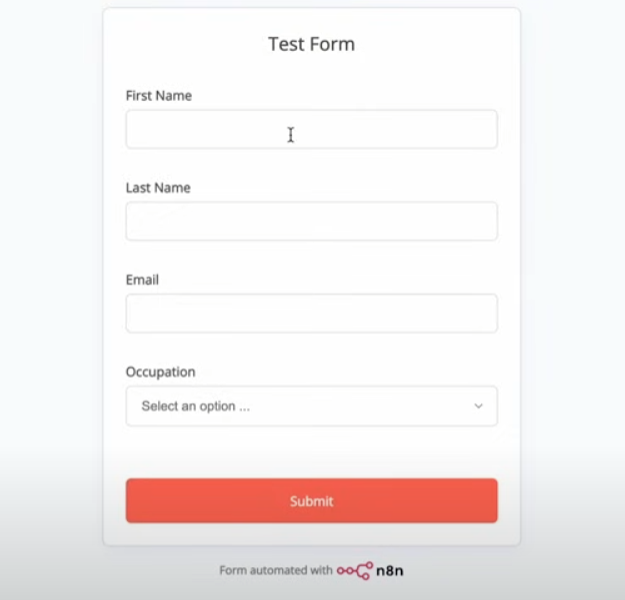
- Create Form Fields:
- Add First Name (Field Type: Text)
- Add Last Name (Field Type: Text)
- Add Email (Field Type: Email)
- Add Occupation (Field Type: Dropdown List), and add Student, Engineer, and Doctor to the options.
- Test and Pin Data:
- Click Test Step. n8n will pop up a form for you to fill out. Submit it with sample data (e.g., select Student for the occupation).
- This step is crucial! In the node's Output window, click the "pin" icon in the top right. This will "pin" the test data, allowing you to reuse it for testing in subsequent steps without having to fill out the form every time.
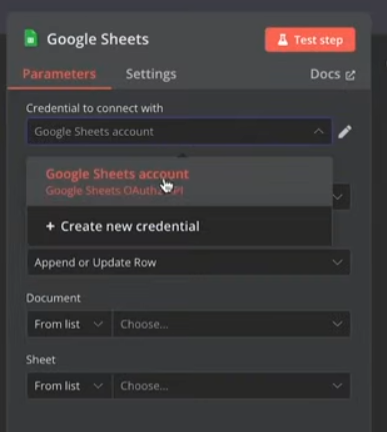
Step 2: Add Data to Google Sheets
- Click the + to the right of the trigger node, search for and select the Google Sheets node.
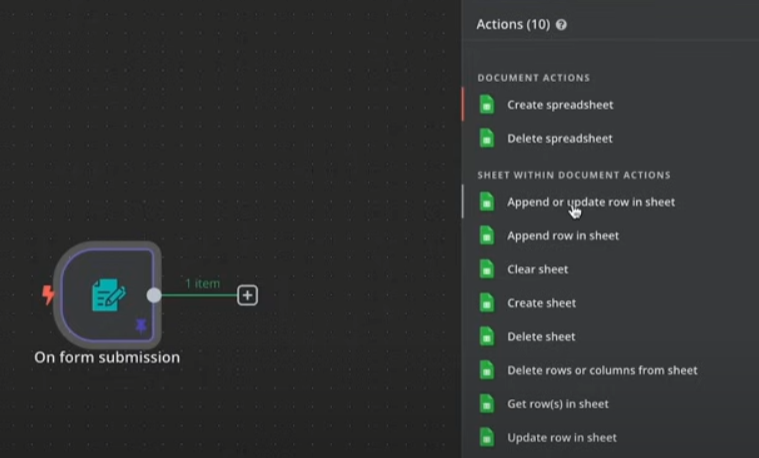
- Choose the operation Append or Update Row.
- Set Up Credentials: Click the "Credential" field and create a new credential to connect your Google account.
- Select Spreadsheet: Create a new spreadsheet in your Google Drive with corresponding columns (First Name, Last Name, Email, Occupation). Back in n8n, select this spreadsheet and the specific sheet.
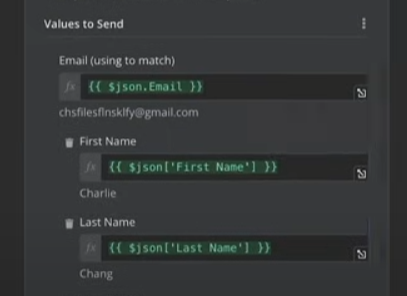
- Map Fields: Drag the data from the form's input on the left to the corresponding Google Sheets columns on the right.
- Set Match Column: In the Column to Match On field, drag in the Email. This prevents duplicates; if someone submits with the same email multiple times, n8n will update the existing row instead of adding a new one
- Click Test Step. Check your Google Sheets. Did the data write successfully?
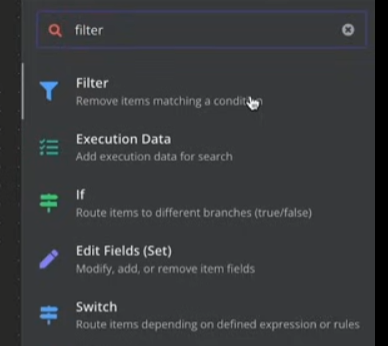
Step 3: Filter & Branch (Filter & Switch)
- After the Google Sheets node, click + and add a Filter node. We want to filter out students and only process engineers and doctors.
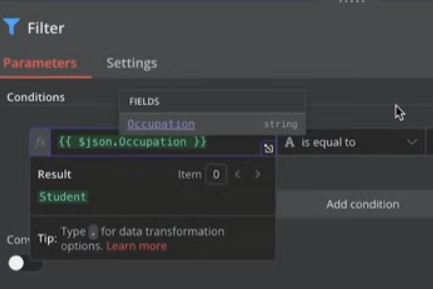
- Set Condition: Drag Occupation into Value 1, select the condition Is Not Equal To, and enter Student in Value 2.
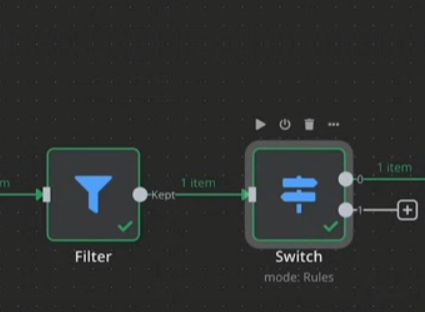
- After the Filter node, click + and add a Switch node. This allows us to follow different paths based on occupation.
- Routing Rule 1: When Occupation equals Teacher
- Routing Rule 2: When Occupation equals Doctor

Step 4: Send Customized Email
- After the Switch node's output 0 (Engineer), add a Gmail node with the operation Send a Message.
- Set the recipient and subject, for example, the subject can be: "New Teacher Potential Customer!"
- Set the recipient and subject, for example, the subject can be: "New Teacher Potential Customer!"
- Duplicate Node: Right-click the Gmail node, select Duplicate, and connect the copied node to the Switch's output 1 (Doctor).

- Modify the duplicated Gmail node's subject to: "New Doctor Lead!"
- Test and Activate: Click Execute Workflow in the top right to run a full test. Once everything is correct, toggle the switch in the top left from Inactive to Active, and save.
Congratulations! You've learned how to use n8n to process forms, connect to cloud services, and add conditional logic!
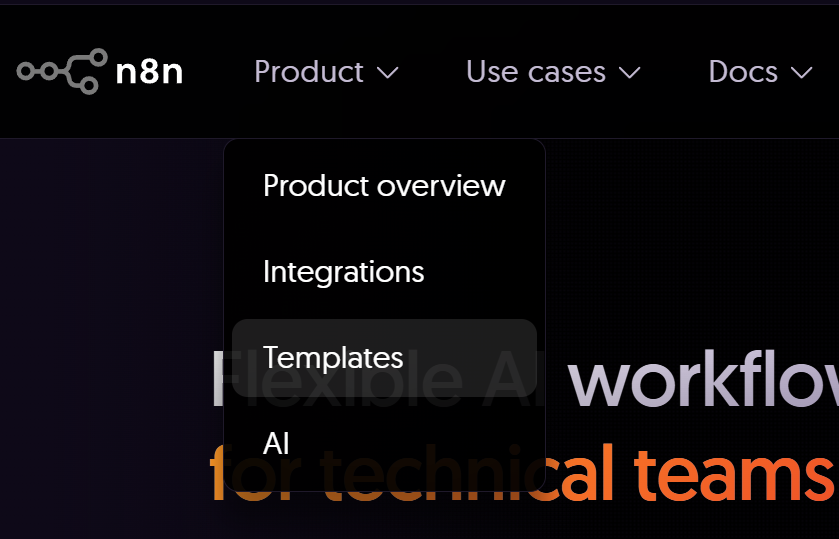
Leveraging n8n Templates: Copying Expert Workflows with One Click
One of the best things about n8n is its active community. You don't always have to start from scratch.
- Go to the n8n Website: In the "Templates" section of the official site, you'll find hundreds of ready-made workflow templates created by the official team and community members n8n Free trial Link
- Find a Template: You can filter by application (like OpenAI, Google Sheets) or use case (like AI, Marketing).
- Copy and Paste:
- Once you find a template you like, click Use workflow.
- You can choose to Copy template to clipboard.
- Go back to your own n8n canvas and simply press Ctrl + V or Cmd + V to paste. The entire workflow will appear on your canvas!
- Set Credentials: After pasting, you just need to replace the nodes' credentials with your own (API keys) according to the template's instructions, and you can start using it right away.
For beginners, this is the best way to learn how experts construct complex workflows and to solve problems quickly.
Chapter 6: The Path to Mastery: Advanced n8n Techniques
- Must-Learn Code Node: When built-in nodes aren't enough, write custom logic in JavaScript to handle complex data or call any API.
- Error Handling: Set up an "error workflow" that automatically triggers when your main workflow fails, sending you a notification to make your system more robust.
- The Magic of Webhooks: Generate a unique URL that allows any service supporting webhooks (like e-commerce platforms, payment systems, LINE Bots) to trigger your n8n workflows in real-time.
Conclusion: Your Automation Era Begins with n8n
We've gone from what n8n is and why it can save you a ton of money, all the way to environment setup, core concepts, and building our first automation example by hand.
I hope this detailed n8n tutorial has successfully demystified the world of workflow automation for you. n8n is more than just a tool; it's a way of thinking: standardize and proceduralize repetitive tasks, then hand them over to machines to execute.
Seeking Professional Help? Get to Know 99aicreator's Localized AI Automation Process Service
Looking at the introduction above, you may be excited, but at the same time, you may also have some doubts: "These tools look great, but our company doesn't have an IT department, and I don't have time to study them myself, what should I do?"
This is completely normal! For many Hong Kong enterprises, the core business is the top priority. In this case, seeking professional consulting services that understand the Hong Kong market is a more efficient and stable shortcut.
This is exactly where a professional team like 99aicreator can come in. They don't provide tools, but a complete "done-for-you" solution tailored for Hong Kong enterprises.
99aicreator's Service Model:
- Localized Consulting: Experts will first gain a deep understanding of your operating model and unique "pain points" in Hong Kong to identify the most valuable and suitable links for AI automation.
- Customized Development: Then, they will tailor-made an exclusive automation process for you, handling common complex situations in the Asian market such as multiple languages and currencies.
- Post-Maintenance and Optimization: After delivery, they will continue to monitor the operation of the process and make adjustments and optimizations at any time according to the development of your business.
~